


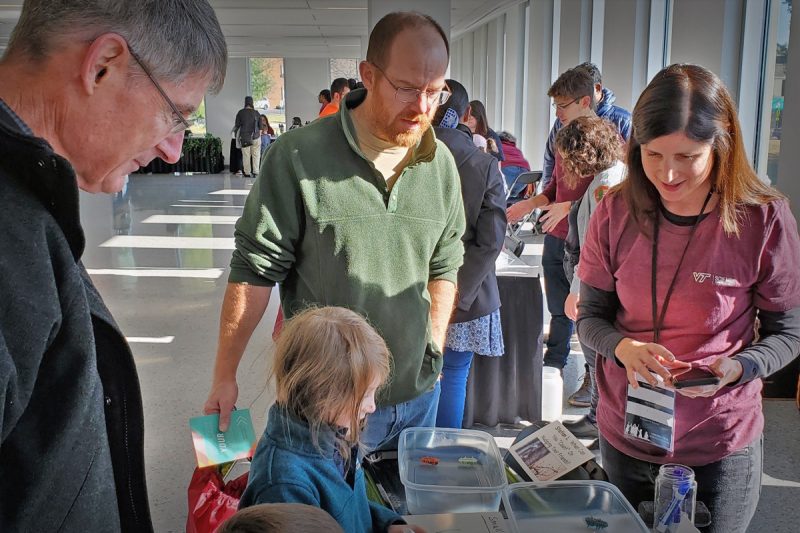
From Hokie researchers to your home: science activities for kids to do this summer
Science doesn’t take place just in a lab or field station — discoveries can happen anywhere, even in your own kitchen or backyard. And most scientists will agree: The best discoveries are the ones you make.
For the curious kids out there, affiliated faculty members of the Fralin Life Sciences Institute gave their suggestions for fun, kid-friendly science experiments and activities to do this summer. Follow along to learn how to:
- Make your own bird feeder and identify backyard birds with Dana Hawley.
- Extract DNA from a strawberry with John McDowell.
- Test for and grow microbes in petri dishes with Kylie Allen.
- Familiarize yourself with native plant species with Jacob Barney.
Getting to know your backyard birds
Birds are back in Virginia after most of them migrated south for the winter. With summer well underway, the birds’ breeding season is over. Young birds that hatched in the spring have finally fledged and left their comfy nests to take on the world. The best part about birdwatching is that wherever you live, you’re probably able to participate.
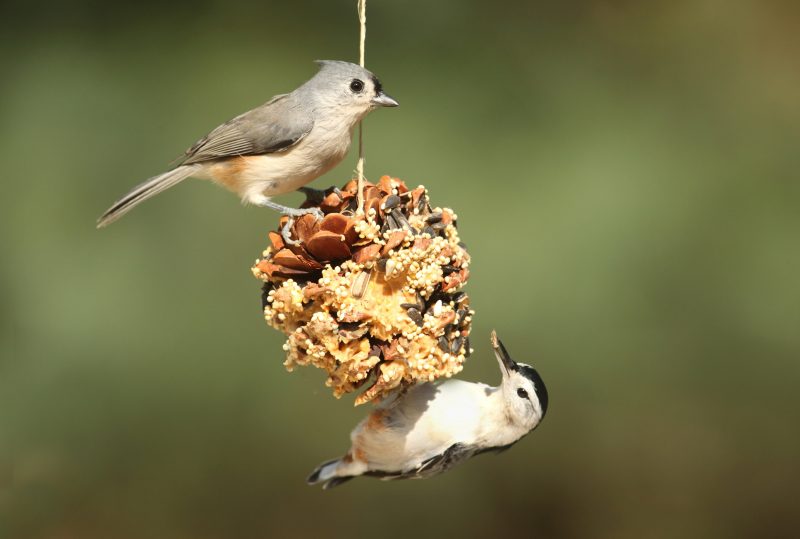
Dana Hawley, a professor in the Department of Biological Sciences in the College of Science, suggests that one way to observe birds is by making bird feeders to hang in your yard, which will attract a variety of species. Bird feeders are a great way to support a healthy backyard bird population and help parent birds feed their chicks. Plus, it’s a meaningful way to experience nature from home.
"Birds are beautiful to look at and listen to, and they also help us by keeping pesky insects in check and helping the plants around us spread their seeds," said Hawley. "Feeders are a great way to draw in birds for a closer look. I love watching birds eat together because they can act a lot like us. Some birds are very social, but they can also have trouble sharing at times."
Using pinecones, string, peanut butter, and various seeds, you can make pinecone bird feeders to hang in your yard.
Instructions:
- Collect pinecones from your backyard or nearby trees.
- Lay out all of your materials: pinecones, peanut butter, string, seeds, paper plates, and spoons. You can purchase a bag of birdseed, or make your own mix using ingredients like sunflowers, cracked corn, or shelled peanuts.
- Pour the birdseed mix into a bowl.
- Take a pinecone and spread peanut butter all over its scales using a spoon.
- Roll the peanut buttered pinecone in the bowl of bird seed.
- Tie a string around the top of the pinecone and hang it in your yard or porch. Try to hang it somewhere where pesky squirrels can’t reach it!
- Make as many bird feeders as you like. Remember that you can always make more once the seeds are eaten!
Once your bird feeders are assembled, start a log of the birds that visit your feeder. Take note of as much information as you can before the bird flies away.
- Record the data and time.
- How big is the bird? Is it small like a sparrow (about as tall as a tennis ball)? Is it large like a crow (taller than a soccer ball)? Or is the bird somewhere in between and medium-sized, like a robin?
- What does the bird look like? Does it have any special markings? What colors are on it?
- What does its beak look like? Is it long like a blue jay’s? Or short and stocky like a finch’s triangular bill?
- Does the bird like to hang out on the ground, in a tree, on a fence, or does it quickly fly away?
- Do you notice any birds pushing another off the feeder so they can have a turn?
Using your notes, search the internet or flip through a bird field guide to figure out which species you saw. Once you find its name, be sure to note it in your log! Even expert bird watchers keep a log or a “life list” to remember all the birds they’ve seen.
Some common Virginia bird feeder visitors include the: northern cardinal, Carolina chickadee, white-breasted nuthatch, tufted titmouse, house Finch, American goldfinch, song sparrow, house sparrow, and blue jay.
If you’re looking for more bird-related activities, check out these materials from Hawley’s ornithology students.
This guide to common birds includes a list of species commonly found in Virginia (and clues for identifying them!), tips for bird watching, and ways to make your home more bird friendly.
Check out this activity book to find coloring pages, a scavenger hunt, craft ideas, and bird-themed recipes for you to snack on. There’s something for all ages!
I can see DNA? How to extract DNA from a strawberry

We have trillions and trillions of cells in our body, but what tells those cells how to behave? That’s DNA, a set of instructions stored in the nucleus of a cell that tells it what to do. Our DNA is what makes us unique as individuals, and it controls everything about us: hair color, height, aspects of our personality, health, and so on.
Since DNA is stored in our cells’ nuclei, we can’t see it with our own eyes. But John McDowell, a J.B. Stroobants Professor of Biotechnology in the School of Plant and Environmental Sciences in the College of Agriculture and Life Sciences, suggests otherwise.
"I've extracted DNA hundreds of times over my career, and I never cease to marvel at how cool it is to see DNA with the naked eye. At the same time, it seems unbelievable that this opaque blob contains such intricate information. But it does — and we still have a lot to learn about how this information is stored and transmitted, and how it evolves over time,” said McDowell. “I hope that some of you might be inspired to join the next generation of DNA researchers!"
By following a specific protocol adapted from Scientific American and using some common household materials, you’ll be able to extract DNA from a strawberry and actually see it with your own eyes.
Instructions:
- Gather all of your materials:
Water
Coffee filters
Clear plastic cups
Dish detergent
One skewer coffee stirrer
One re-sealable plastic bag
Salt
Two fresh or frozen strawberries
Rubbing alcohol (Note: be sure to chill the rubbing alcohol in your freezer for half an hour before starting)
- Pull off the leaves and stem from the strawberries and throw them away. Place the strawberries in the plastic bag, push out the extra air, seal the bag, and begin to smush the straberries as best you can.
- Now, prepare the extraction liquid. In a cup, thoroughly mix one third cup of water, half a teaspoon of salt, and one tablespoon of dish detergnet. Do you have any ideas for what these ingredients do to the strawberry?
- Open your strawberry bag and add three tablespoons of the extraction liquid that you just made. Re-seal the bag and use your fingers to mix everything together.
- Place a coffee filter over one of the cups. Pour your smushed strawberries over the filter. Let the mixture drip until all that's left in the filter is thick, wet pulp. You can throw away the filter and pulp now.
- Measure half a cup of the cold rubbing alcohol. Very slowly, pour the alcohol into the cup with your filtered strawberry mixture. You only want to pour enough alcohol to form a one-inch layer on top of the strawberry liquid, so you may not use the whole half cup. Be sure to do this slowly - you don't want the straberry and alcohol to mix!
- Look at your cup. What's happening? You should see a gooey, white string-like substance form at the surface.
- So, what happened?
The dish detergent caused the cells to break open and release their DNA, so that the salt could cause the DNA to clump together, making it visible.
The alcohol precipitated — or separated — the DNA out of the strawberry mixture, isolating it from the rest of the liquid.
- Take your skewer, coffee stirrer, or similar tool and try to gather up the DNA to get a better look. You're holding two strawberries' worth of DNA!
- If you'd like to do more, you can turn this into an experiment. Here are some ideas:
Try extracting DNA from other types of fruit. Which ones worked? Which ones didn’t? Why do you think that happened?
Try modifying the protocol. What happens if you change the amount of salt or detergent?
Wait, what’s growing inside my house? How to culture microbes
Microorganisms, or microbes for short, are tiny living things that are too small to be seen by the naked eye. They are found all around us in the air, on surfaces, in water, and soil. The human body houses millions of microbes, too.
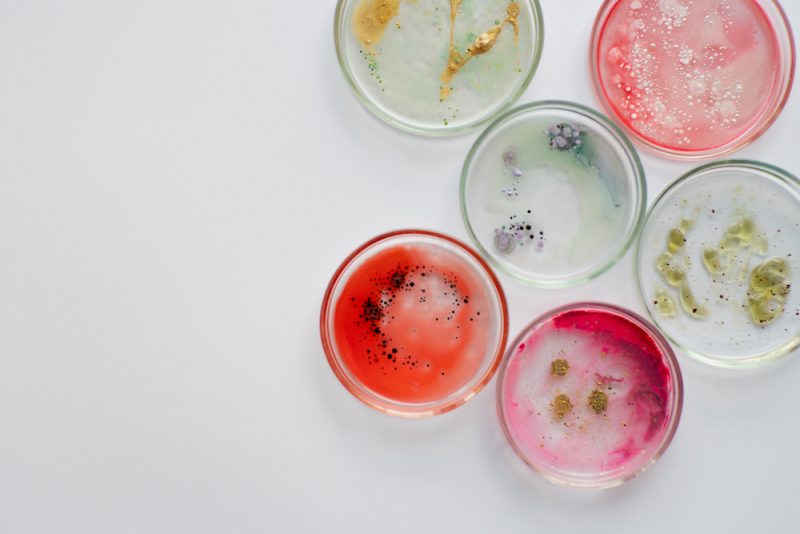
“Although some can make us sick, others are essential for our health. The most common types of microbes are bacteria, viruses, and fungi. Although you cannot see individual microbes with the naked eye, they often form colonies containing millions of cells that can be seen,” said Kylie Allen, an assistant professor in the Department of Biochemistry in the College of Agriculture and Life Sciences.
In this experiment, you will make nutrient plates to grow bacteria and fungi colonies by collecting samples from around your home. This is called culturing, a process in which you collect a small sample of bacteria or fungi and grow them into a larger colony.
Caution: This protocol requires the use of boiling water. This activity is suitable for kids aged eight and older with parental supervision. Please be careful!
Before you get started, wash your hands, wipe the kitchen counter, and sanitize all the dishes you will be using. Microbiologists must use “sterile technique” to minimize contamination and to be sure that only the desired microbes are cultured.
Following this set of instructions with some content modified from madaboutscience.com and sciencing.com, you can learn which plants grow around your home.
Part 1: Setting up your project
- Gather all of the following materials:
One cup of water
1 teaspoon of beef stock powder
1 teaspoon of sugar
1 teaspoon of gelatin
Saucepan for boiling mixture
Petri dishes or aluminum cupcake holders (preferably with lids)
If you use the aluminum cupcake holders, you may need to place them inside a cupcake pan since the holders might be a little flimsy.
If you use petri dishes, make sure to keep the lids closed until directed otherwise! This will help reduce the risk of contamination.
Felt tip pen to label petri dishes
Cotton swabs
- Pour the water into a saucepan. Bring it to a boil.
- Add the beef stock powder, sugar, and gelatin to the water and stir until all the ingredients are dissolved. This is your agar solution. It provides "food" for the bacteria and fungi, plus all the necessary resources for a few cells to grow into a colony.
- Let your new agar mixture sit for 10 minutes. It still needs to be hot enough so that the gelatin doesn't set, so don't wait too long.
- Take the lids off the petri dishes or the cupcakes holders. Fill each dish with the hot agar mixture. Be very careful - it may be best to let an adult handle this part.
- After you fill the dishes, immediately cover your petri dishes with lids or cover your aluminum cups with foil to prevent contamination.
- Refrigerate your petri dishes for four hours. They can also be stored in the fridge for up to two days, if you want to continue your experiment another day.
Part 2: Collecting samples
Microorganisms are not hard to collect because they are absolutely everywhere. Here are some ideas to try:
- Expose one plate to the air in your house, and the other to the air in your backyard.
- Touch a plate with your thumb and another plate with a piece of hair.
You can also use a cotton swab to collect samples from doorknobs or other surfaces around your home. Maybe you’d like to swab your favorite toy, a cell phone, or a video game controller. Think about items that you regularly touch but might not clean all the time.
After swabbing a source, open one agar plate. Take the cotton swab and quickly streak it in a zig-zag pattern across the surface. When you’re done, throw the swab away. Reseal the agar plate. Don’t forget to label it. You don’t want to forget what item you tested.
Most organisms will grow fastest at warmer temperatures (around 37 °C). So, if you can, place your plates near a heat vent or in another area in your home that is likely to be warmer. You can also make an incubator by placing a small lamp in or on top of a box and putting your plates inside. Colonies will show up in one or two days if they are heated or in three to five days if they are left at room temperature.
Part 3: Observations
Check your plates every day to see what appears. Make notes of the size, shape, and color of any colonies as they appear. You can start what scientists call a lab book — a notebook with detailed information about the experiment and its results.
Once you get an idea of the types of colonies you get from each source and how long they take to appear, you can start designing new experiments. Try seeing if microbe growth is altered in colder temperatures, if putting disinfectants in the agar prevents microbial growth, or how decreased amounts of oxygen affect growth.
To manipulate the level of oxygen, seal the lid onto a petri dish using tape, then place the plate into a Ziplock bag. Carefully press all of the air out of the bag. Make sure to record your hypotheses about what will happen under these different experimental conditions. After the experiment, you will be able to prove or disprove your hypothesis based on the results. Make sure you consider why you got a particular result and how you may do the experiment differently next time.
Using technology outside: How apps can help us learn about nature
Scientists are always developing new technologies to support their research in the field. They might use drones to map forests, cameras to snap photos of wildlife in their habitat, or satellites to monitor how Earth is changing over time.
But you can also use technology to learn more about the natural world. In fact, it’s right at your fingertips. Jacob Barney, an associate professor in the School of Plant and Environmental Sciences in the College of Agriculture and Life Sciences, has a plan to help you familiarize yourself with which plant species grow in your neighborhood.
As a biologist, Barney studies invasive plant species and how they affect the ecosystem. Invasive species are plants or animals that do not naturally belong in an ecosystem. For example, Himalaya blackberry is a shrub native to Armenia, a country in western Asia. Because of its delicious fruits, people planted Himalaya blackberry all across the United States. It’s a tough plant and spreads very quickly, so it can overpower native species, changing the composition of the ecosystem.
Native plants, however, occur naturally. They’re a crucial part of the food web, and wildlife species rely on them to create a healthy habitat. Insects like bees and beetles love native plants, and when you have a healthy population of insects, wildlife like birds and small mammals tend to follow. So native plants support a greater abundance of wildlife and maintain a balanced ecosystem.
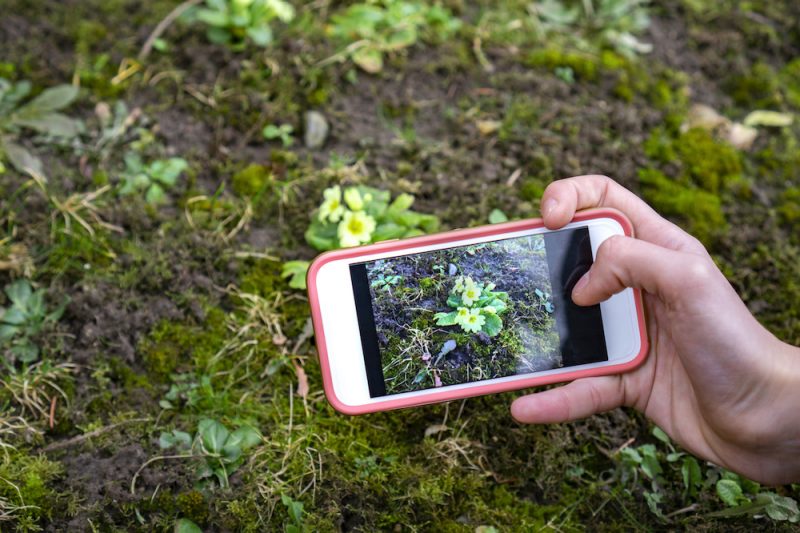
Barney suggests using iNaturalist, a free app designed to help you ID plant or animal species and learn about its biology. When you see a species that you’re interested in, just log into the app, snap a photo, and identify it. That entry becomes a datapoint so that people know where you found that species.
“It allows users to add datapoints to its distribution, which helps researchers like myself learn about where species are, and how they are changing their distributions in response to climate change,” said Barney. This is called citizen science — a field of science that relies on public participation to collect data.
If you’re unsure about what plant or animal you’re looking at, switch to an app called Seek. It uses your phone’s camera to identify a species for you.
“I tried Seek in my yard, and it’s pretty cool to move the camera around and watch the app narrow down the ID. So, for those who don’t know the species yet, they can use this app to ID it for them, and then they can learn about it!” Barney said.
To learn more about native and invasive plants, Barney challenges you to locate and identify ten native species.
Instructions:
- With an adult, download iNaturalist and Seek.
These apps were developed by the National Geographic Society and the California Academy of Science.
They are secure to use and protect user data, but please read iNaturalist’s privacy policy here.
iNaturalist requires kids aged 12 and younger to have an adult’s permission.
- With an adult, go for a nature walk around your yard, neighborhood, local park, the Huckleberry Trail, etc.
- Try to avoid ornamental or garden plants—they can be imported from all over the world.
- Once you find a plant that you’re interested in learning about, open Seek and follow the on-screen instructions to figure out which kind of plant it is.
- Seek will tell you if the species is native. If so, open the iNaturalist app, create a new entry, and take a photo of your plant. By doing so, you log when and where you found it so that scientists like Barney can use that data.
- Try to log 10 native species! Once you start getting familiar with your native plans, you’ll be able to identify them without an app.
If you enjoyed this activity and want to make your backyard more wildlife friendly, learn how to start your own native plant garden using this guide from the Virginia Native Plant Society.
- Written by Rasha Aridi